Configure Contact Sync
The connector syncs a contact from Dynamics 365 or Power App when a Spotler Job with the operation Sync Contact is created. This is the trigger for the connector to start doing its work.
You can create a Spotler Job yourself, every time you make a change to a contact, but that would be cumbersome.
Workflows
The connector installed a couple of Workflows that will trigger when an Account, Contact or Lead is created or changed and will create a Spotler Job:
Account WF01 - Create Spotler JobContact WF01 - Create Spotler JobLead WF01 - Create Spotler JobSpotler Permissions WF01 - Create Spotler Job
These Workflows can be tweaked to your liking, or even completely deactivated, if you wish to build the logic in another way, like Power Automate.
View Workflows
- Sign in to the Dynamics 365 environment (or in to Power Apps).
- Select the Settings icon (⚙️) on the upper right, and then select Advanced settings.
- In the left navigation bar (or the down arrow next to Settings on the top bar), select Processes under Process Center. Click on Processes to view the processes.
- Change the view dropdown from My Processes to All Processes.
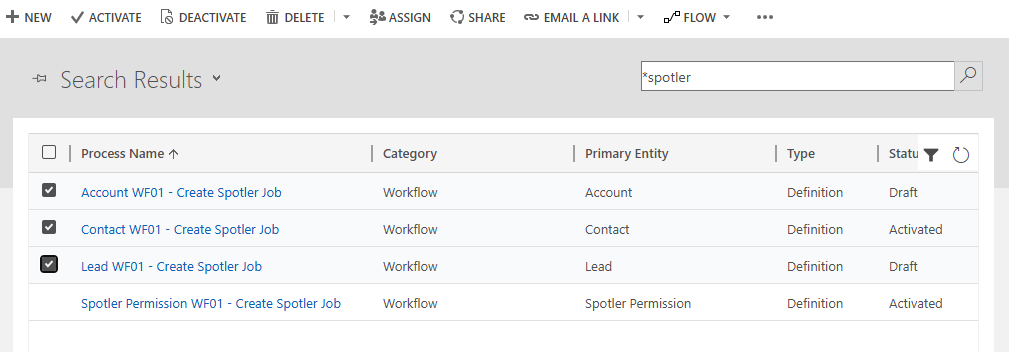
- In the Search bar, type in *spotler and press enter to find all the workflows related to the connector.
- In the list of processes, select the workflow that you want to open, Activate or Deactivate.
Activate / Deactivate (Draft)
You only need Activate the workflows for the type of Table that you want to synchronize to Spotler: Account, Contact and/or Lead.
In the list of processes, the column Status will tell if the Workflow is Active or not. You can change the status by selecting Workflow and then press Activate or Deactivate in the top command bar.
The workflow for Spotler Permissions should always be Active.
Open Workflow
To open a Workflow go to the list of processes. Open the specific Workflow by clicking on the name of the Workflow.
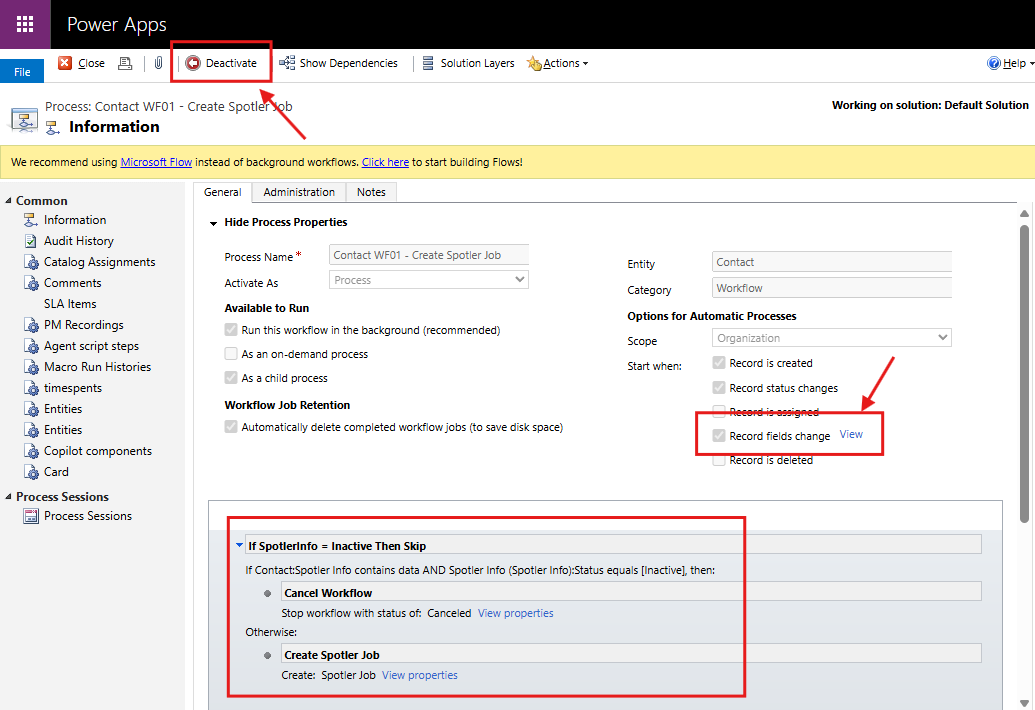
The bottom part shows the Workflow steps. To view the Fields that trigger this Workflow, click on View next to the text Record fields change.
Trigger Fields
Active Workflows only trigger for specific Fields that are changed. When a specific Field is changed, a Spotler Job will be created.
So, when the mapping is changed, you often want to update the specific Fields that triggers these workflows.
Edit Fields
You can only edit a Workflow when it is in Draft (=Deactivated).
- Open the Workflow.
- Click on the Deactivate button in the top command bar and press Deactivate in the confirmation dialog.
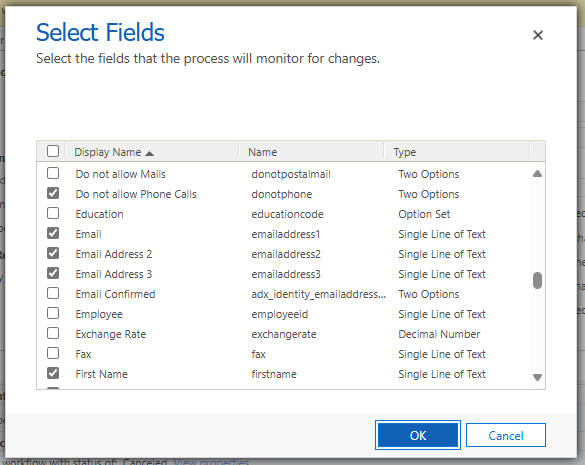
- Click the button Select next to the text Record fields change.
- Select the Fields you want to trigger the Workflow for.
- Press OK when done.
- Press Activate in the top command bar to save and activate the Workflow. Press Activate in the confirmation dialog.